Monday 30 May 2011

Coconut Cream Pie

Whilst I don't mind coconut, it is again not one of the things I instantly go for. This recipe was picked by a friend, so apart from a slice to taste, the pie will be a gift to her.

Although it is a one page recipe, it has a lot of little steps inside the main points. Firstly you have to make the dough up which will form as the pie base. It says to do it in a freestanding electric mixer, which I do not have. Instead I rubbed the flour and butter together with my fingers until it was crumb like and then used a wooden spoon to stir in the sugar and egg. Once it had come together I used my hands to kneed it and then it is wrapped in clingfilm and goes into the fridge for 30 minutes to rest. once rested you then roll it out and place it into the pie tin and this then goes into the fridge for half an hour again.

Once the base has rested for a second time it goes into the oven to be baked blind. I have still not got around to buying some baking beans so used uncooked rice instead. The greaseproof paper and beans/rice are then removed and the base is cooked for a further 15 minutes until golden. It needs to cool on the side completely before the filling is added.

The recipe says its a Coconut cream but the coconut flavour is actually in the filling which is a custard. The pie is then just topped with whipped cream and shavings. To make the custard you have to mix the sugar, cornflour, salt and the milk and coconut milk together over heat whilst whisking until it thickens. Then a few tablespoons of this mixture are added to the already whisked egg yolks and vanilla essence before this then gets added into the hot mixture and it is whisked until thickens more and actually looks like custard.

It is poured straight into the now cool pie base and covered with clingfilm to stop any skin forming, which I detest, so gross! This is left to cool on the side before going into the fridge for an hour or more. Mine was left overnight, as you have now gathered i make these recipes in the evenings once baby has gone to sleep, so usually gets too late to finish them the same night. 

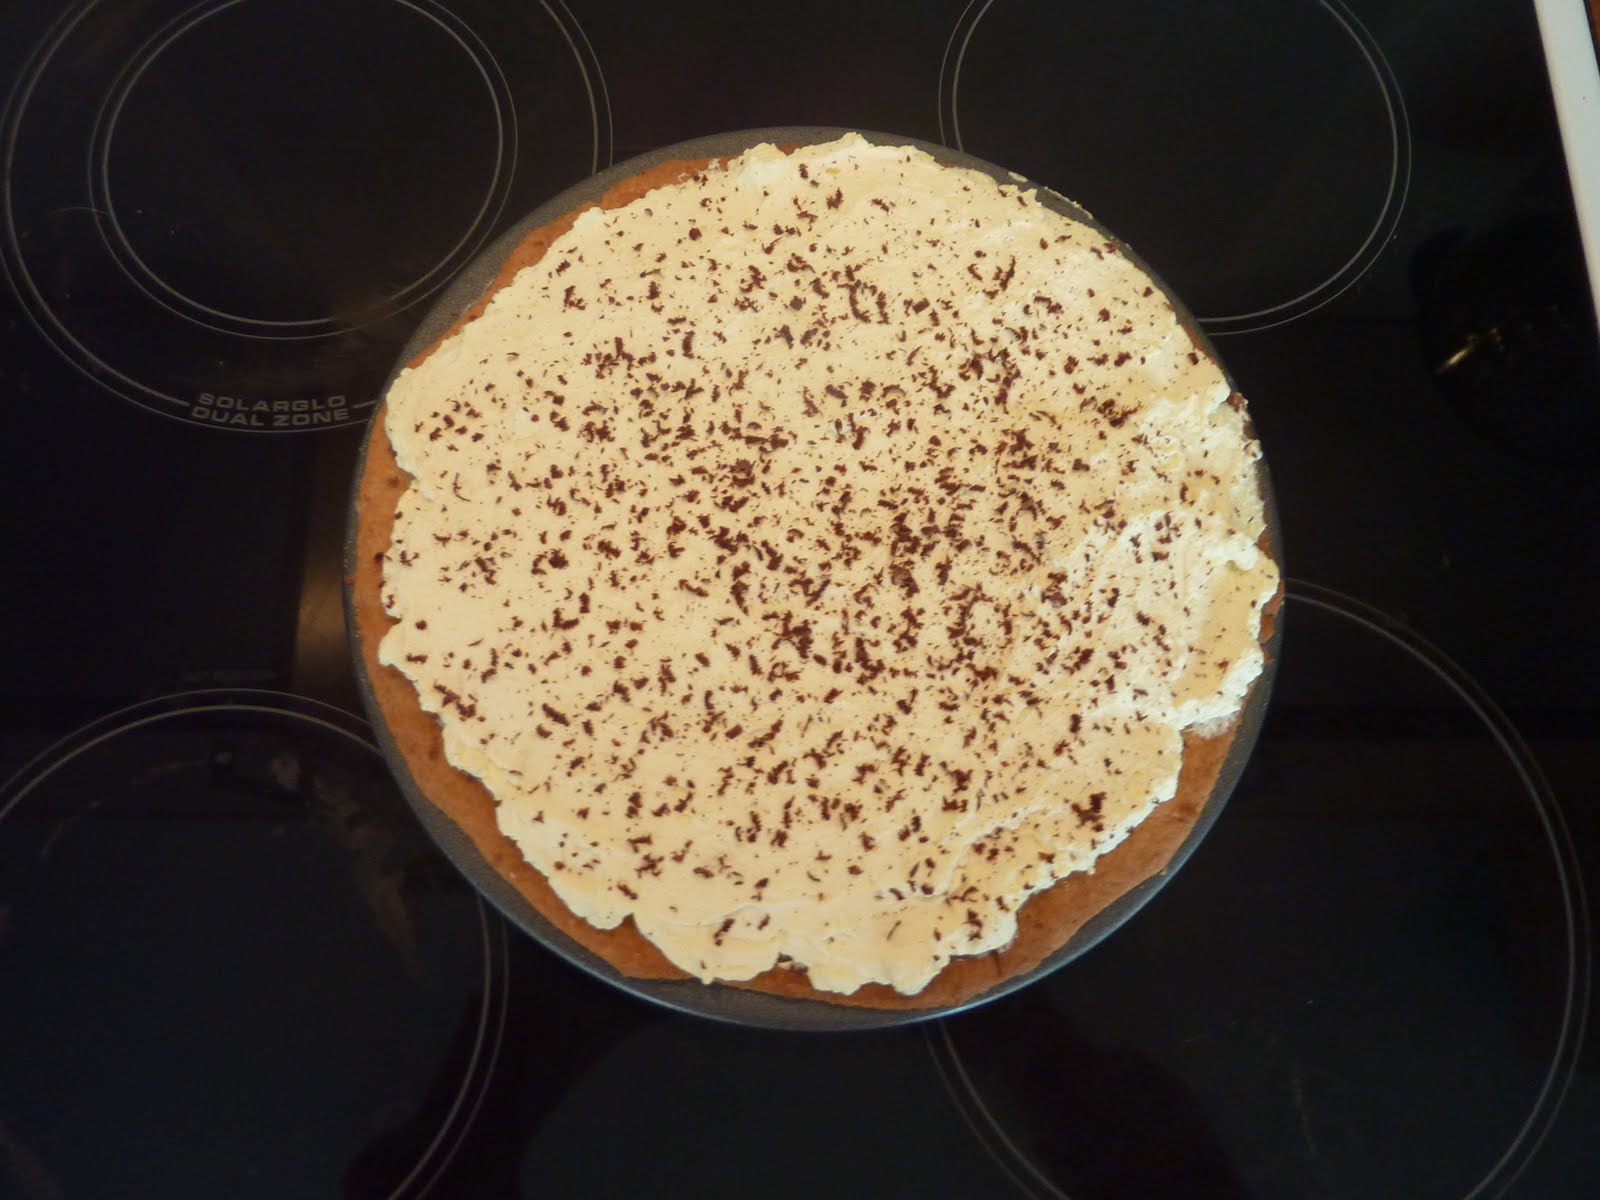
The next morning the pie was looking lovely and wobbly and the coconut custard smelt wonderful. I made the topping of double cream whipped with vanilla essence and a small amount of icing sugar until it forms peaks then spooned this onto the pie. Neither me nor my husband could find any coconut flakes or shavings in the supermarkets so I decorated the pie with grated chocolate as an alternative that is actually suggested in the recipe.

I took my slice to try this afternoon. Not really looking forward to it as, as I said it was a friend who was keener on this recipe, but I was pleasantly surprised. The custard tasted like a normal custard with a nice undercurrent of coconut. It was not nearly as strong a flavour as I was expecting and it went well with the cream topping. Unlike the Grasshopper pie which seems too creamy, this one had struck the right balance between the whole. The base is also sweeter than I was anticipating. Something I would definitely have another slice of tomorrow when I deliver it to my eagerly awaiting friend.


Black and White Chocolate Cheesecake Bars

Last weekend I made two recipes that were not something I would usually pick or particularly fancy. Both turned out well and tasted nice, even the usually yucky banana flavour. This weekend I decided to make at least one thing that would tickle my taste buds more than anyone else's. So the Black and White Chocolate Cheesecake bars were a must.

This is a bit of a mixed recipe. It has a lot of little steps within the main stages of the baking. The first is to make the chocolate dough that is to serve as the base of the bars. It is flavoured with cocoa powder not actual chocolate, unlike the cheesecake topping. Once the dough has come together you must tear off about a quarter of itto go into the fridge in clingfilm to be used on the topping. The remaining three quarters and pressed into the greaseproof paper lined baking tray and then put into the fridge as one to chill for about 30 mins.

The oven is preheated so that once the tray of dough is cool it can go straight in to bake for 20-25mins. It needs to then be left on the side to cool completely but keeping the oven on to bake the cheesecake topping.

To make the topping you melt the white chocolate first and let that cool a little. There is a lot of cooling in this recipe. Then mix the rest of the ingredients, the Philadelphia, sugar and egg together then add the chocolate and stir thoroughly. Spread this onto the, as you have guessed it, cooled base and them break up the remaining quarter of dough and crumble onto the topping. This is then baked again for 25mins and then needs to be fridge set for a few hours. 

By the time the cheesecake had come out of the oven it was 8.30pm. It had to cool on the side for a little while before being transferred to the fridge. I was desperate to try one of these bars but could also not ignore my bed calling me, so had to wait until I had my elevenes and cuppa to taste one.

They were definitely worth the wait though, taste just gorgeous. As you know, I do love my cupcakes and my chocolate, but even so I can usually be quite restrained and not eat the whole batch in one go. Whoever these bars are just too good and I confess I had about 4 in one day! I do not want to give any of these away for the Hubby's work mates to try, or dare I say it, even my close friends. Think hubby and I were good enough tasters for this recipe, no-one else needs to try them...I may make other batch just for fun!


Thursday 26 May 2011

Spiced Apple Cake with Brown Sugar Frosting

Where to begin...This is my first layer cake, not just from this cook book but ever. I had to go out and buy two new 8inch tins as the black hole that has recently opened up in my house swallowed my last lot, along with many other things this week. I only bought two tins as apart from these cakes I have no need for four, so planned on making the mixture up in one batch and then just halving it out and baking two layers at a time.

This recipe seemed to slip me up a lot. Firstly I had to go out and get apple juice as didn't order any in, it somehow got missed off my shopping list. Then when trying to grate the Granny Smith apples I couldn't get them to grate finely as there was too much juice in the apples themselves and so had to grate them on a larger size and the use a knife to chop them up a little more. The apples, juice, spices and some of the brown sugar were all simmered together. The rest of the dry ingredients were the sieved together before the warm mixture was added.

Once the sponge batter was made I separated it out into two glass bowls, so I could make sure there was an equal amount in each, making it easier to then separate again into two tins at a time. This went into the oven for about 23 minutes on each batch, slightly more than the cook book states. Once all four layers had been baked they were left to cool. This was overnight as it got too late in the evening to make the meringue style icing and put the cake together.

The next evening I picked up where I left off and started on the icing. The first step is the mix the egg whites with the dark brown sugar over a bowl of simmering water, whisking it continuously until it thickened in volume and formed soft peaks. Then you had to remove from the heat and add the sugar, which is cubed, a few at a time. At this stage the mixture became very runny and I realised I did not whisk it enough over the heat at the beginning. To try and rectify this I added some more sugar and then put the mixture in the fridge to cool, hoping this would help it to set a little better.

It worked and the icing was thick enough to sandwich the four layers together and then ice the whole top and sides of the cake with a good covering. For this recipe I did not half the quantity of icing as, having never made a layer cake before, I wasn't sure how much was needed. The amount it made was exactly the right amount to cover the cake and give a generous filling between each layer. Once iced I decorated the top with some edible silver balls. Being four layers it made a massive sized cake, very tall.

The tasting came with a friend and tea. It tasted amazing. The frosting was not like the usual icing used on the cakes, it did actually have a glossy texture to it and wasn't as sweet as used brown sugar not icing sugar. The sponge has a subtle apple flavour, but it was the spices that were the more prominent flavour. Not the sort of cake I would usually made, prefer the more obvious sweet flavours but this is one I would happily make again. Think it would go down well at a family gathering myself.


Monday 23 May 2011

Banoffee Cupcakes

This is the first recipe to be made that I am not actually that keen on tasting. Banana is one of my least favourite foods, not something I ever eat, to be honest its the texture of them, so squishy I cant stand it and the noise people make when eating a banana too, yuck. Decided that since I have to make everything, might as well make something that isn't one of my favourites. Settled on the Banoffee cupcakes for Saturday as taking them to a family BBQ so thought they would go down well there.

The sponge part of the recipe is the same as all the others, just your basic ingredients but with two ripe bananas added to the mixture at the end before it is poured into the cases and into the oven. I think I had quite large bananas as once they were mashed it seemed quite a lot in volume and even with filling the cases by two-thirds I had enough batter to make 20 cupcakes. Because it had made more than the usual 12-16 I decided not to half the quantity of the topping, especially as this was actually the longer and trickier part of the baking.

The topping is a caramel custard one rather than a frosting but it meant I had to actually make the custard myself. Not particularly hard, just a few more steps than usual. Firstly had to bring milk with vanilla essence to the boil and make a paste with the other dry ingredients of sugar, flour, cornflour and egg yolks, not whites. Then you add a little of the milk to the paste before adding the paste to the remaining milk on the boil and whisking it until it is thickened and basically looks like custard. This is then spread onto a clingfilm-ed baking tray, covered and left to cool for 30-40 minutes. We were actually heading out to lunch with family at this point so the custard had a little longer to cool than was needed.

Once we were back it was a rush to get the cupcakes topped before the BBQ. All that was needed was to whip the double cream and then fold the custard into this, after stirring the custard to remove any lumps beforehand. It states in the cook book you can pipe this onto the cupcakes but I just used a tablespoon. One heaped spoon was enough to cover each cupcake and because it was a custard it smoothed out onto the cupcakes so easily it didn't take nearly as long to ice them as usual. I then finished them off with some grated dark chocolate. Looked fabulous and off they went to the BBQ.

At first I was apprehensive about tasting them as when the sponges were cooking you could smell the banana in them. We all had a cupcake once the BBQ steaks and chicken had gone down and I have to admit that after the first bite where I did grimace slightly at the banana they weren't actually that bad. The other family members that are not as strange as me to dislike bananas thought they were wonderful. The custard and the sponge were not too overpowering in flavour, it was delicate and went well together. The chocolate shavings on top also just helped to add that little extra something to them. For something I wasn't looking forward to making, I have to say I am actually rather proud of myself to making one of the longer recipes and trying something I would usually avoid due to personal preference. That was what this challenge and 
blog is all about though.


Monday 16 May 2011

Marbled Cupcakes

Whilst away I made two recipes midweek to try and catch up after my illness and keep on track of the two every weekend needed. I made the Hot chocolate cupcakes the day before we went away, then the two whilst on the boat, so when we got back on Saturday I was still due to make one more to complete my quota.


As cupcakes are my favourite and I have the main sponge ingredients always stocked in my cupboards, I set upon making the Marbled cupcakes.


Had to divide the sponge measurements in half, one for the chocolate and one for the vanilla. Only difference is the chocolate has the cocoa powder added to the dry mixture and the vanilla sponge has the vanilla essence added to the egg and milk mixture.


Instead of making one up at a time I measured out both bowls of sugar, flour and butter one after another. I luckily have two sets of whisk attachments so used one in the chocolate sponge and then removed those and put a clean set on for the vanilla so as not to get any of the mixtures in one another.


All worked out well so far except when I halved the mixture of 240ml of milk, I poured 120ml into the vanilla sponge from the measuring jug and the rest into the chocolate sponge batter, forgetting the eggs would have added more volume. This meant my vanilla batter was quick firm whilst the chocolate came out runny. I added a little more flour to the runny mix but decided not to medal too much further in case it made a drastic difference and just put the firmer mix into the cases first.


When putting the end of the teaspoon in to create the marbled effect, I again did so carefully as was worried the runny chocolate mixture might meant they actually just ended up mixing together than than swirling through. I needed have worried as it seemed to work out okay and into the oven they went to cook.


Due to the difference in batter thickness, I haphazardly placed them in the cases so was expecting some to come out a little wonky and raised more on one side which happened. Even so they were being iced so didn't matter too much.


Made up the icing, halving the quantities for both the vanilla and chocolate. Made a mistake with the milk quantity again. The recipe called for 25ml of milk in both, so in my head i somehow managed to half that to 17.5ml for the vanilla icing, which came out looking lovely and smooth. It then dawned on me it should have been 12.5ml so that us the amount that went into the chocolate icing, which turned out smooth but thicker than the vanilla, but as all the icing on the Hummingbird cupcakes are. Wasn't too much of an issue when decorating the cakes, it just meant it again didn't swirl as well as the vanilla was lighter than the chocolate. I just put a tablespoon of each flavour either side of the cupcake top and then used a palette knife to smooth and marble them together. It didn't come out quite like the photo in the cook book, but I am still rather pleased with the effect and they look scrummy still.


My husband tasted one of the cupcakes before they were iced and said they were delicious. I had one with my tea on Monday morning and I wholeheartedly agree with him. I though the hot chocolate was creeping up the list of tastiest cupcakes but these have just over-taken them. They now rank second under the famous Red Velvet cupcakes. By far one of the best. Who knew mixing simple vanilla and chocolate would be so divine.


Chewy Monkey Bars

This is the second recipe I picked to make on the Narrow boat. Again because it is one with few steps and this one requires no baking as its a fridge set bar.

Unsure if this is a healthy recipe or not, it seems like it as there is not sugar needed and is chock full of nuts but the glue holding it all together is made from honey, butter, melted marshmallows and peanut butter. That might have answered my question...

Started by melting the above ingredients together on the hob and then it is added and mixed to coat the rice crispies, rolled oats, cherries, coconut, nuts and chocolate chips, although I didn't have any of those so just added roughly chopped chocolate. Once its coated and pressed into the tin, the remaining chocolate is melted and drizzled over the top with the mixed nuts. I decided to add mini marshmallows on the top since I had some to hand too.

This is then set in the fridge for an hour. Since we were limited in space in the fridge and boat we didn't line the tray with greaseproof paper as decided not to turn the bars out and cut up but just to cut a slice when we wanted one.

The bars had to be left out of the fridge, again due to space, when they didn't hold together well once cut as slightly warm. I am not one for nuts, as said in the Chocolate Chunk Pecan pie blog, but these were lovely. They had the right mix of nuts with chocolate and sweetness and filled a hole as a snack well. Would recommend them even for those nut haters out there. Yummy.


Orange, Almond and Yoghurt Loaf

Even though I am on holiday on the Kennet and Avon Canal on a Narrow boat I am still baking away, as loyal as ever. The first recipe I picked for this week away was the Orange, Almond and Yoghurt loaf. Chose this one as it is one of the recipes with the least steps and not many additional ingredients from the standard cake mix.

I had to bring along my scales, electric whisk and loaf tin as the boat only has the basic crockery and dishes. Found when started that there wasn't a glass bowl big enough for the mixture so I had to mix it in a saucepan.
Apart from the challenges of being on a narrow boat in a very small kitchen the recipe went well and the mixture looked and smelt wonderful as It was being poured into the loaf tin. My Mother in law, whom we was on holiday with, ordered allthe ingredients I needed for the two recipes I chose to make whilst away but unfortunately forgot to order an orange for the orange zest needed in this loaf. We did have orange juice and so I had to substitute one tablespoon of zest for one of juice. It wasn't quite enough though, as the zest is stronger we actually needed more juice for the flavour to become apparent once the loaf had baked.

I also have never baked in a Gas oven before and so didn't need my Mother in law to actually turn it on for me, I had no clue how it worked apart from the hobs. So now I have another new skill to add to my collection. The loaf was to be cooked for 50 to 60 minutes at gas mark 3. I found that it needed turning halfway through so it didn't burn on one side and it needed about 65-70 minutes in total. Think that could just be down to the oven being on a boat.

We also didn't have any flaked almonds to decorate the loaf with so I just sprinkled a little bit of the ground almonds over the top which actually gave it a nice look and colour when they had browned. you could smell the loaf cooking in every part of the boat and once it had cooked we had a slice with our afternoon tea.

Everyone thought it was lovely. A light sponge, moist from the yoghurt with sutble flavours although the orange couldn't really be tasted, just added something to it other than almonds. My father in law liked it every much and eat most of it to himself even though he isn't in favour of sweet and sugary things lol.

I like making loaves now, aside from my stable of cupcakes it is my second favourite thing to make so will start to try some more out. They go down well with my older relatives that prefer something a little less sweet and intense as some of the pies and cupcakes can be. And it just goes to show that you really can bake these recipes anywhere and still get a fabulous result.


Saturday 7 May 2011

Hot Chocolate Cupcakes

Made these cupcakes for a girlie night in, thought they would be a nice change from the usual chocolate cupcakes and wanted to see how this would be.

The recipe is the same as the normal chocolate cupcake recipes except that you add hot chocolate powder to warm milk rather than sifting cocoa powder into the dry ingredients. Essentially making the batter up with actual hot chocolate.

It was a simple step to add into the otherwise normal procedure. Everything went smoothly with this attempt although I do think my electric scales are starting to give up the ghost. Work fine most of the time but do occasionally mess around and show a weight when there isn't anything on them. Also constantly showing that the battery is low when its been replaced recently..another thing that needs to be replaced soon I think, before they give up completely and I am stuck stranded on my baking island.

I did run out of muffin cases so only managed to make 15 cupcakes as that is all I had. They did rise quite a bit as had slightly more batter in each case due to the lack of a 16th. Made up the icing, which again uses hot chocolate powder dissolved in warm milk and added to the main icing ingredients. I used half the quantity as usual and made enough to give a nice but not overwhelming covering. It could have maybe done with a little more but I think if made up the correct recipe amount it would have been too much. The icing smelt so good when I was making it. Noticed the colouring of the sponge and the icing is slighter than the normal chocolate cupcakes. Guessing that is down to the milk being premixed with the powder.

The girls couldn't wait to taste them and I had to fight them off until my camera battery had charged enough to take the pictures first.

They went down extremely well. Everyone, including my hubby who doesn't usually like cupcakes with the icing, said they were brilliant. You could taste the difference from using actual hot chocolate. Can't put my finger on how the taste does differ from the chocolate cupcakes but believe me there is something there. I did wonder before making the recipe how this would turn out but they are lovely, I think this might become one of my favourites too.


Monday 2 May 2011

Peanut Butter and Chocolate Pie

I am surprised I have held back so long on making something with peanut butter. Have been dying to since I first opened the cook book. After making some whoopie pies not too long ago, I decided on a pie this time.

Even though this is a no cooking fridge-set recipe it is actually one of the longest so far. The first step is blitzing the cookie and butter mixture together to make the base. Although its a pie it goes into a conventional 9 inch cake tin lined with greaseproof paper. I hit against an issue here straight away. The mixture turned out very running again, as it did with the Grasshopper pie, and I could not get it to stick up the sides so had a thicker base instead. Unsure why this happened again as used the quantities given, only reason I can come up with is I don't have an actual food processor but a sort of blender thing so might not have mixed it in the same way. Am going to invest in a proper processor as need one with all this baking and also baby food making.

Once the base was in the fridge to set for 40 mins I started on the first half of the filling. It is in two parts, one with the peanut butter and chocolate and another with double cream in place of the chocolate. So had the mix sugar and cornflour with milk in a saucepan until it is thickened nicely. It took a long time of constant whisking to get there. It was then mixed with the chocolate until that had melted and stirred in well. This then went over the base and back into the fridge for around 40 mins again.

Next was whipping the double cream, which I think I might have done too much as didn't seem to go into soft peaks. Added the remaining peanut butter mixture and that went onto the chocolate mixture and back into the fridge again for 50 mins.

The final topping is whipped cream and sugar. Again that went on top and then to serve. By this time it was 10.30pm at night to not quite the time for pie and the peanut and cream layer still didn't seem set enough so left it overnight in the fridge to try tomorrow.

Finally had a slice at lunch with my tea. Getting it out of the fridge I could see the peanut and cream layer was still a little sloppy and if the tin was taken off it wouldn't have stayed in place so took a quick picture and my slice and put it back into the tin. I think it is meant to be this consistency but the biscuit base is meant to come up the sides so assuming this would hold the fillings in place. Need some advice of the bases as they never seem to come out like a paste as they should and end up sloppy and it affects the overall pie in the end. The taste was nice though. The peanut butter was divine with the chocolate and that layer had set well but the cream layer was a little too runny and once the slice was cut it seems to just slide all over the place. Not as nice as it is with the chocolate and think there was too much of a creamy taste with the whipped cream and sugar topping on the peanut and cream one. A nice and unusual flavour and something that would work well if the base had held the filling in place.

If anyone has any suggestions on the biscuit base, any would be helpful. Is it the food processor issue or have others experienced the same thing?


Fizzy Orange Cupcakes

Still not 100% after this virus. The main symptoms came and went rather quickly, but still a little run down and needing the tissues by the box. Little one isn't completely right yet either but we are almost back to normal so baking and blogging has resumed.

I have been waiting to make one of the soda cupcakes and was planning on making the Lemonade ones, having bought a small tester pack of 7 flavours from Asda, but on actual inspection of the box it included Cola and Orange but not Lemonade oops! So my husband decided on the fizzy orange ones instead.

Where to start, brain is still a little fuzzy but from what I can recall the recipe went fine as they usuallu do for the cupcake. The usual ingredients except for the orange zest and syrup which is mixed with the milk before added to the dry ingredients. No mishaps this time, think that was the first time everything went smoothly.

Managed to make 16 cupcakes from this batch. They smelt gorgeous then I was spooning the batter into the cases, as did the icing when that was being made up. Still making a mess with the icing sugar, although the shield stops it when the whisk is going, it still doesn't stop the cloud going up when measuring and sifting. I halved the amount for the icing, as I usually do and again made enough to cover the cupcakes nicely.

Forgot to buy some decorations for the top of the cupcakes but the orange syrup added a slight tint to the icing which helped make them look pretty.

And now the taste test..I found the icing wasn't too overpowering as some have suggested. Thought it was a strong (as is all the flavoured icings from the cook book) but it wasnt too much and the sponge had the nice subtle orange flavour as well as being light and fluffy. Now wondering if the Cola and Lemonade variations will also taste as yummy.